How to Fix Outlook for Mac Rules Are Not Supported for This Account?
Encountering the “Rules are not supported for this account” error in Outlook for Mac? Don’t worry, you’re not alone, and this issue can usually be resolved with a few simple steps. Outlook is a widely used email application, known for its powerful features, including Rules, which let users automate actions for incoming messages.
However, some Mac users have reported this error when trying to use the Rules feature. If you’re facing this issue on your MacBook or other macOS devices, continue reading. This article outlines several practical solutions that can help you resolve the problem quickly and get the Rules functionality working as expected.
User Scenarios – Outlook for Mac Rules Are Not Supported for This Account
“Lisa switched to Outlook for Mac to centralize her personal and business communications. She added her iCloud email and tried to set up rules to sort order confirmations, supplier invoices, and customer inquiries into separate folders.
However, when she tried creating rules in Outlook, she received the error: “Rules are not supported for this account.”
“Faculty members using Outlook for Mac started reporting that they couldn’t organize their emails using rules. The IT team received numerous tickets saying: “Outlook says rules are not supported for this account. Is something broken?”
“Priya manages multiple clients’ accounts and needs rules to move emails into project-specific folders automatically. Her Microsoft 365 account worked perfectly with rules, but when she tried the same with her Gmail account, Outlook showed: “Rules are not supported for this account.”
Instant Solution – MacArmy OLM Converter for Mac offers a seamless solution, allowing you to export OLM files into more than 15 widely used formats, including PST, MBOX, EML, PDF, CSV, HTML, DOC, IMAP, G Suite, Outlook.com, and others.
With its user-friendly interface and powerful functionality, the tool makes OLM file conversion quick and hassle-free.
Download the free demo version today to explore its features and try out the conversion process before committing to the full version.
How to Resolve “Outlook for Mac Rules are not Supported for this Account”? – Step By Step
Method1. Switch Back to Legacy Outlook for Mac to Use Client Rules
With recent updates, Microsoft has removed support for client-side rules in the new Outlook for Mac. The app now only supports server-side rules, which are available only for Exchange, Outlook.com, and Microsoft 365 accounts. This change affects all newer versions of Outlook for Mac, significantly limiting email automation for users with IMAP or POP accounts.
Steps to Switch Back to the Legacy Outlook for Mac:
If you’re using the new Outlook for Mac and want to switch back to the legacy version to access client-side rules, follow these steps:
Open Outlook on your Mac.
In the top-left menu bar, click on Outlook, then uncheck the New Outlook option.
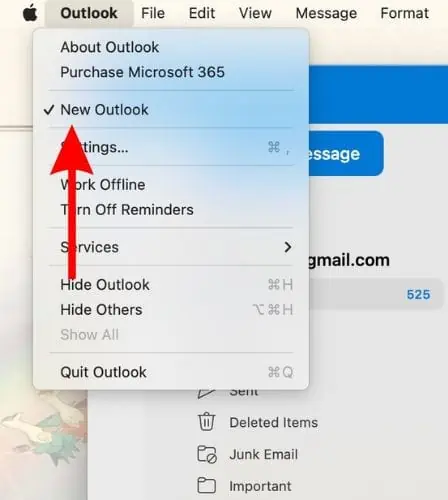
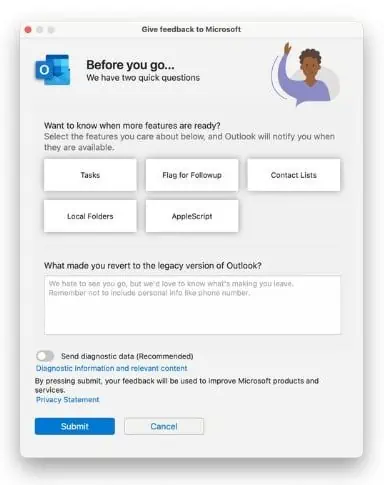
If a feedback window appears, you can enter your comments and click Submit or simply hit Cancel to proceed.
Click Revert when prompted to confirm the switch.

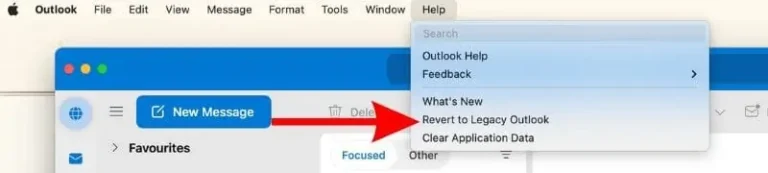
Alternatively, you can go to the Help menu and choose Revert to Legacy Outlook.
Outlook will restart and open in the classic (legacy) interface.
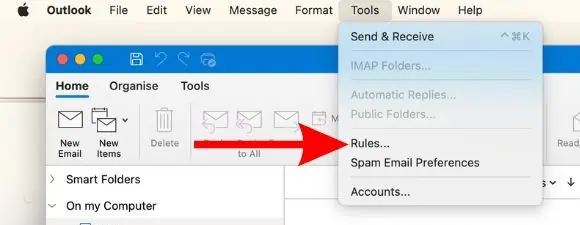
Once in the legacy version, go to the Tools menu and select Rules…
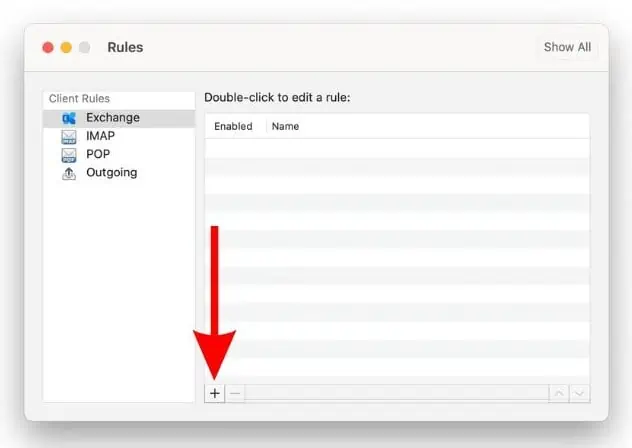
In the Rules window, click the + Add button at the bottom.
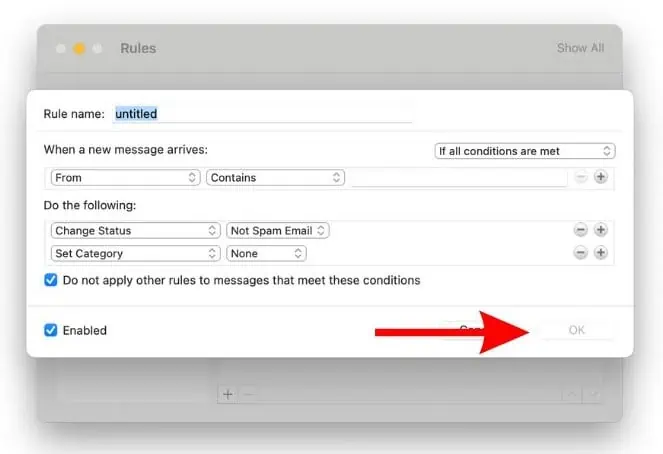
Configure your rule settings in the new window based on your preferences (e.g., move messages, apply flags, auto-forward).
Click OK to save the changes.
Method2. Through Outlook Web to Set Rules
While Outlook for Mac no longer supports client-side rules in its newer versions, you can still configure rules via the Outlook Web interface. However, if you want those rules to work within the Outlook desktop app, you’ll need to revert to the legacy version of Outlook for Mac.
Here’s how you can set up client-side rules using Outlook.com:
Open your web browser and go to Outlook.com.
Sign in with your Outlook or Microsoft 365 account.
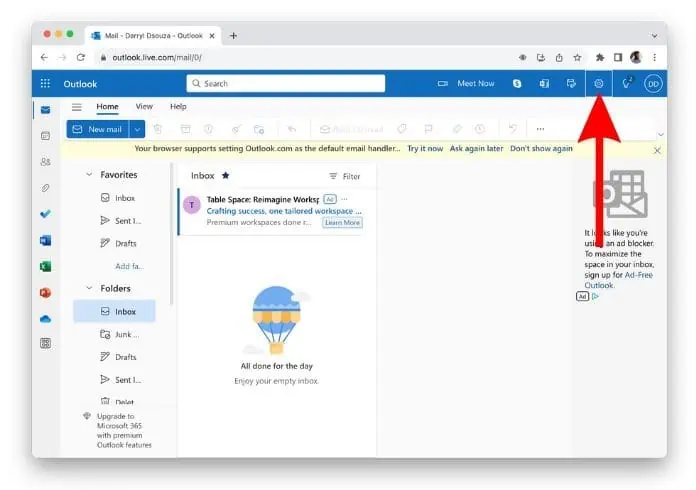
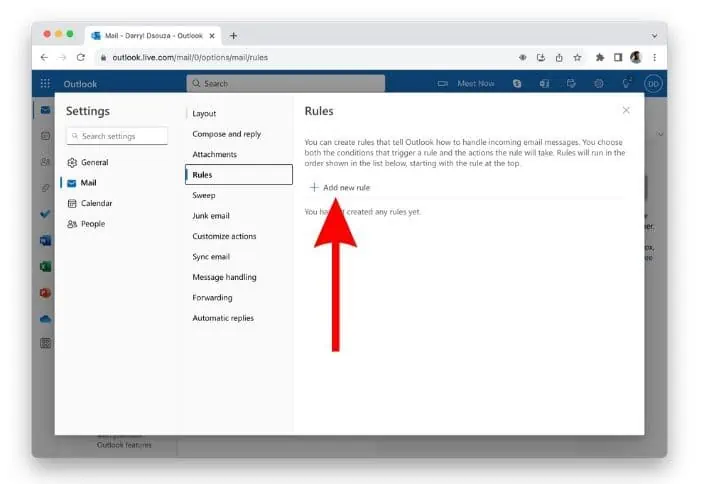
Click on the gear icon (Settings) in the top-right corner, then select View all Outlook settings at the bottom.
In the Settings menu, go to Mail > Rules.
Click on Add new rule to create a new rule.
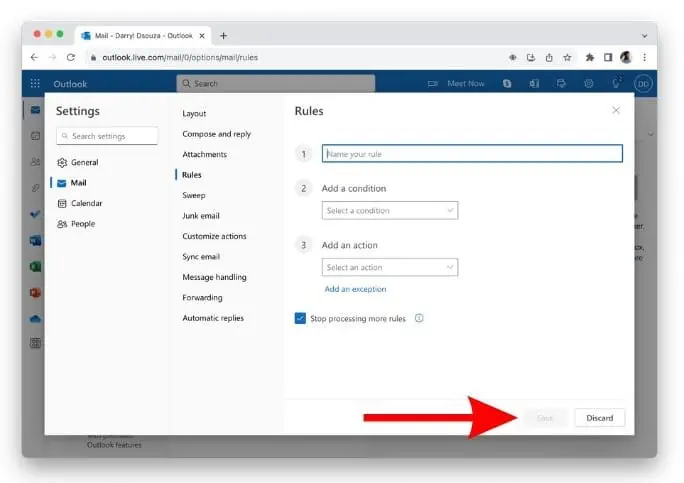
Name your rule, set the conditions (e.g., subject contains certain words, sender’s address, etc.), and define actions (e.g., move to folder, forward, categorize).
Click Save to activate the rule.
Method3. Force Quit and Restart Outlook for Mac
After switching to the legacy version of Outlook for Mac, you might encounter issues with client-side rules. To resolve this, it’s recommended to force quit and restart Outlook on your Mac. Here’s how to do it:
Click on the Apple logo in the top-left corner of the menu bar and select Force Quit from the dropdown menu.
In the Force Quit Applications window, choose Microsoft Outlook from the list of open applications.
Click Force Quit, and then confirm by clicking Force Quit again.
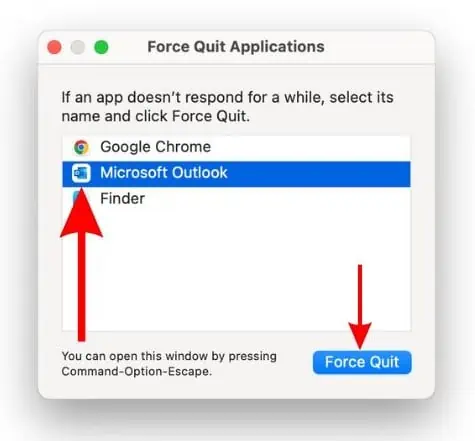
The app will close, which may take a minute. Once it’s fully closed, reopen Outlook.
Check if your Client Rules are now working properly in Outlook for Mac. If not, proceed with the next troubleshooting step.
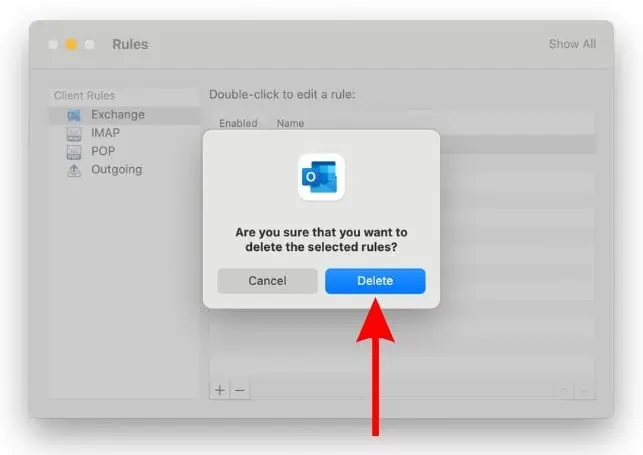
Method4. Delete and Recreate Rules in Outlook for Mac
If none of the previous methods have resolved the issue, the last resort is to delete your existing Client Rules and recreate them. This can be time-consuming, especially if you have multiple rules set up. However, it’s an effective way to fix any issues with your rules. Here’s how to delete and recreate Client Rules in Outlook for Mac:
Open Outlook for Mac and go to the Tools menu.
Select Rules from the dropdown to open the Rules window.
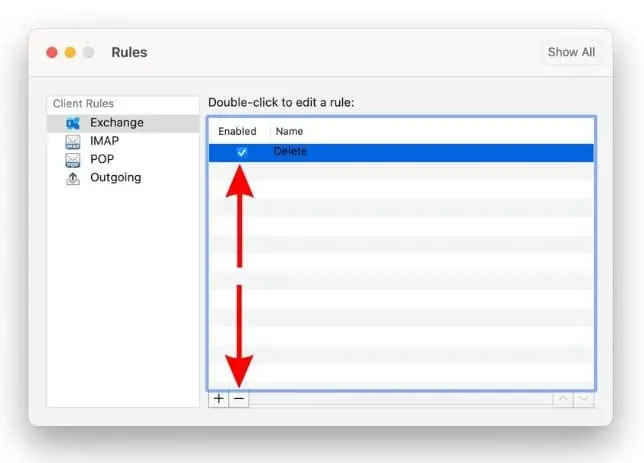
In the Rules window, select each rule you wish to delete, then click the Delete button (usually represented by a trash can icon).
Once all the problematic rules are deleted, click the + button to create new rules.
Set up the new rules based on your preferences (e.g., move messages to specific folders, flag emails, etc.).
Click OK to save the new rules.
Wrapping Up!
We hope this guide has helped you resolve the “Rules are not supported for this account” error on your Mac. If you’ve missed any troubleshooting steps or have further questions about the issue, feel free to reach out to MacArmy Support for assistance.
