How to Upload MBOX Files to Office 365 on Mac?

In many cases, users decide to switch from one email platform to another to access better features and enhanced functionality, which ultimately helps boost productivity. Recently, Microsoft Office 365 has gained significant popularity due to its advanced services, encouraging users to migrate their existing email data. As a result, many people look for reliable solutions to upload MBOX files to Office 365 on Mac. To ensure a fast, safe, and hassle-free migration process, using a dedicated MacArmy MBOX File Converter is an effective option.
MBOX files are designed to store multiple email messages together in one plain text file, making them easy to manage and access. These files can be opened and viewed across different platforms, which is helpful for backup purposes or data transfer. In contrast, Microsoft Office 365 provides a wide range of modern features that streamline daily tasks. It offers strong security measures to safeguard sensitive data, along with built-in tools for handling emails, calendars, and team collaboration efficiently.
Import MBOX to Office 365 – A Practical Solution
This section explains how you can move MBOX files into Office 365 effectively. Windows users can choose between two approaches: a manual method or an automated solution. The manual approach is more complicated and is generally suitable only when you need to import a small number of files. For Mac users, using an automated tool is the recommended and available option. Below, we will walk through the manual process specifically designed for Mac OS users.
Ways to Import MBOX to Office 365 on Mac
There are two main approaches to move MBOX files into Office 365 using OWA on macOS: a manual method and a professional third-party solution. Let’s first look at the manual process to understand how MBOX data can be accessed in Microsoft 365 on a Mac system.
Manual Method to Access MBOX Files in Office 365 on Mac
#1: Click the Apple menu in the top-left corner of your screen and open System Preferences.
#2: From the available options, select Internet Accounts.
#3: Choose Exchange from the account list.
#4: Enter your Office 365 login credentials and click the Sign In button.
#5: Select the macOS applications you want to sync with the account.
#6: Click the Details button, add a description if required, and press OK. After that, close the System Preferences window.
If you prefer not to go through a lengthy or complex setup, you can opt for a direct solution instead. With a dedicated tool, users can simply upload MBOX files and transfer them straight into their Office 365 account without manual configuration.
Direct Method to Import MBOX into Office 365 on Mac Using an Automated Tool
For users looking for a fast and reliable migration, the MacArmy MBOX Converter for Mac is an effective choice. This application allows you to upload MBOX files to Office 365 on Mac, including all emails and their attachments. Throughout the migration process, the accuracy and integrity of the data are fully preserved. Additionally, the original folder hierarchy remains unchanged after the transfer is complete. The tool supports MBOX files from all email clients that use the MBOX format. You can download the free trial version to explore its features and understand the entire migration workflow.
Steps to Import MBOX into an Office 365 Account on Mac
Download the MBOX to Office 365 Converter on any macOS version, including macOS Monterey, and follow the steps below:
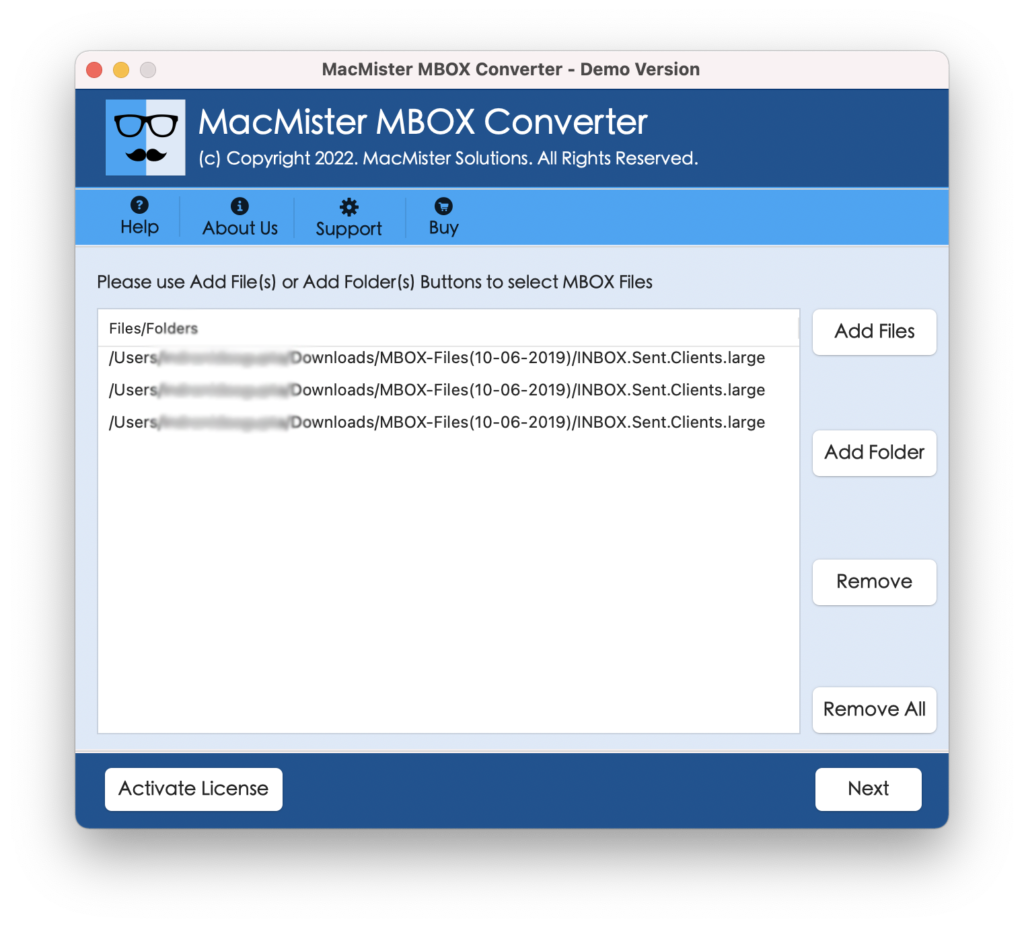
#1: Use the Add Files or Add Folders option to upload your MBOX data, then click Next to continue.
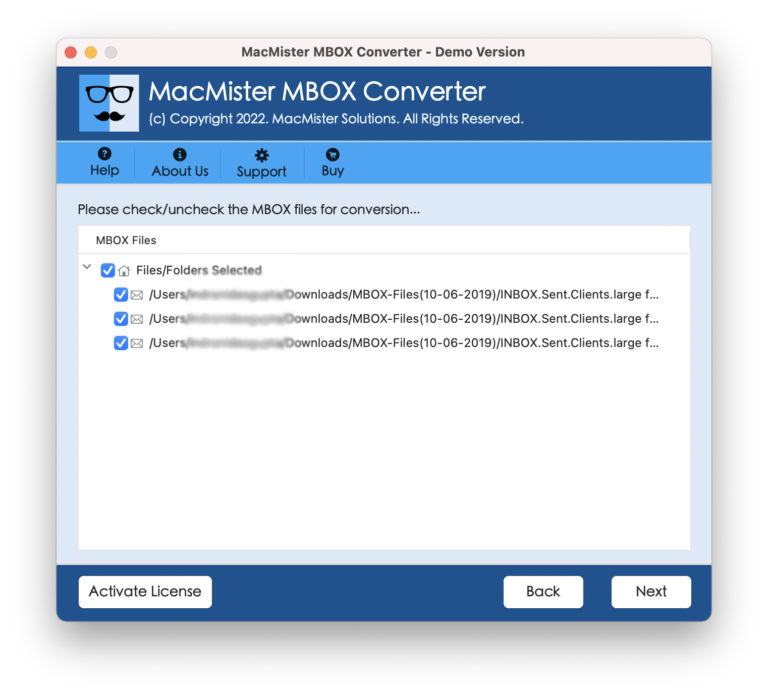
#2: On the next screen, select the required files by marking the checkboxes and press Next again.
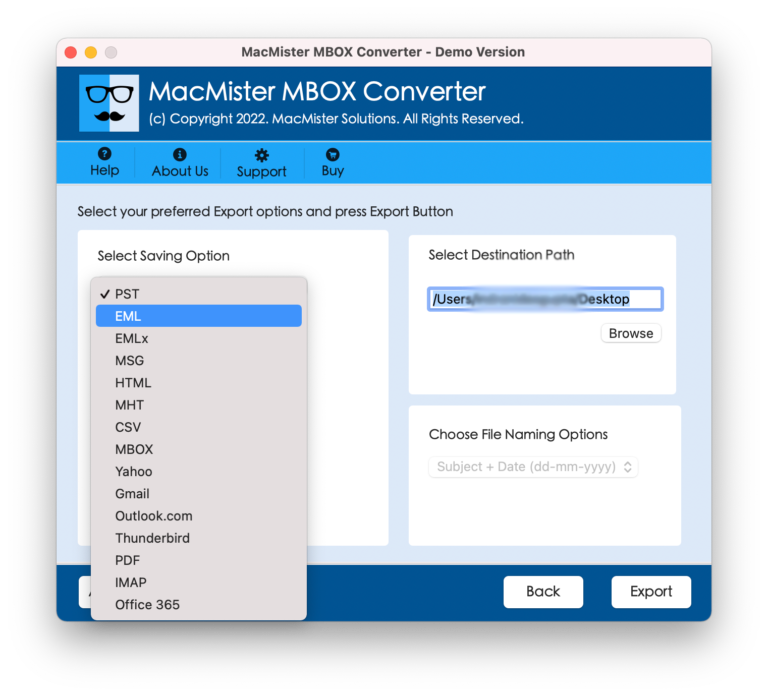
#3: Choose Office 365 as the migration option and enter the Office 365 account details where the MBOX data will be transferred.
#4: Click Export to begin the migration process.

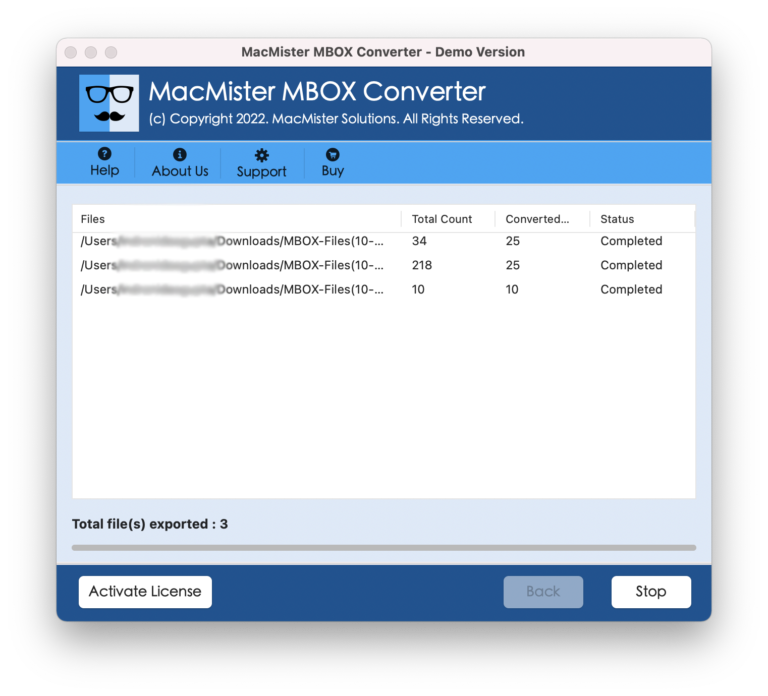
#5: A real-time migration status report will appear on the screen, and once the process is completed, a confirmation message will be displayed.
Free Trial Version
The software provides a complimentary trial edition that lets users migrate up to 25 emails from Mac to an Office 365 account at no cost. This demo version helps users understand how the tool works and explore its key features. Once satisfied with the results, users can purchase a license to perform unlimited email migrations. If you encounter any issues or have questions during the process, the technical support team is available 24/7 to assist you with the application.
Frequently Asked Questions About the Software
Can I install and use this tool on macOS Big Sur?
Yes, the software is compatible with all major macOS versions, including Monterey, Big Sur, Catalina, and others.
I need to migrate more than 20,000 MBOX files to Office 365 in one go. Is this possible?
Absolutely. The application is designed to handle bulk migrations, allowing you to transfer a large number of MBOX files to Office 365 simultaneously without risking data loss.
I can’t locate the MBOX files on my Mac that I want to move to Office 365. What should I do?
There’s no need to worry. By checking the guide on where MBOX files are stored on Mac, you can easily locate the required files on your system.
Conclusion
This article has outlined several methods to upload MBOX files to Office 365 on a Mac system. Users can choose the approach that best fits their requirements and follow the steps accordingly. Each method varies in terms of time investment and technical effort. However, if you are unsure or want a hassle-free experience, selecting an automated solution is often the smarter choice. It is efficient, saves time, and ensures that MBOX data is migrated to Microsoft 365 while preserving email accuracy and the original folder structure.
