How to Add a Signature in Outlook for Mac? – Easy Guide!

Adding a professional email signature in Microsoft Outlook for Mac is an easy way to personalize your messages and provide essential contact information. Whether you’re a business user or someone managing multiple email accounts, a well-crafted signature can save time and maintain a consistent professional image.
This guide walks you through the steps to add, edit, and manage your email signature in Outlook for Mac.
Common User Queries
- “How do I create a professional email signature with my company logo in Outlook for Mac?”
- “Can I have different signatures for different email accounts in Outlook on my Mac?”
- “My signature looks different on mobile devices. How can I fix that?”
- “How do I add social media icons to my Outlook signature on Mac?”
- “Why isn’t my new signature appearing automatically when I send emails?”
- “How do I remove an old signature and replace it with a new one in Outlook for Mac?”
- “Is it possible to insert a hyperlink into my email signature?”
- “Can I copy a signature from one Mac and use it on another?”
Reasons to Create a Signature in Outlook for Mac
Here are key reasons to add a signature in Outlook for Mac:
Professionalism – A well-designed signature gives your emails a polished, professional appearance. It shows that you take your communications seriously and helps establish credibility with clients, colleagues, and business partners.
Consistent Branding – Signatures help maintain consistent branding across your organization. You can include your company logo, colors, tagline, or even a banner to reinforce brand identity in every email.
Saves Time – Rather than typing out your name, title, and contact details every time you send an email, a signature automatically inserts this information saving time and reducing repetitive work.
Easy Contact Sharing – Signatures ensure that recipients always have your contact information, including:
- Phone number
- Email address
- Website
- Office address
This makes it easier for others to reach you quickly and through the right channels.
Legal or Compliance Requirements – In some industries, email signatures may be required to include legal disclaimers, confidentiality notices, or compliance statements. Outlook makes it easy to add these to every outgoing message.
Mobile-Friendly Consistency – When set up correctly, signatures appear consistently across devices, including mobile, ensuring a uniform professional image regardless of where you’re sending from.
How to Add a Signature in Outlook for Mac Manually?
Follow these simple steps to create and apply an email signature in Microsoft Outlook for Mac:
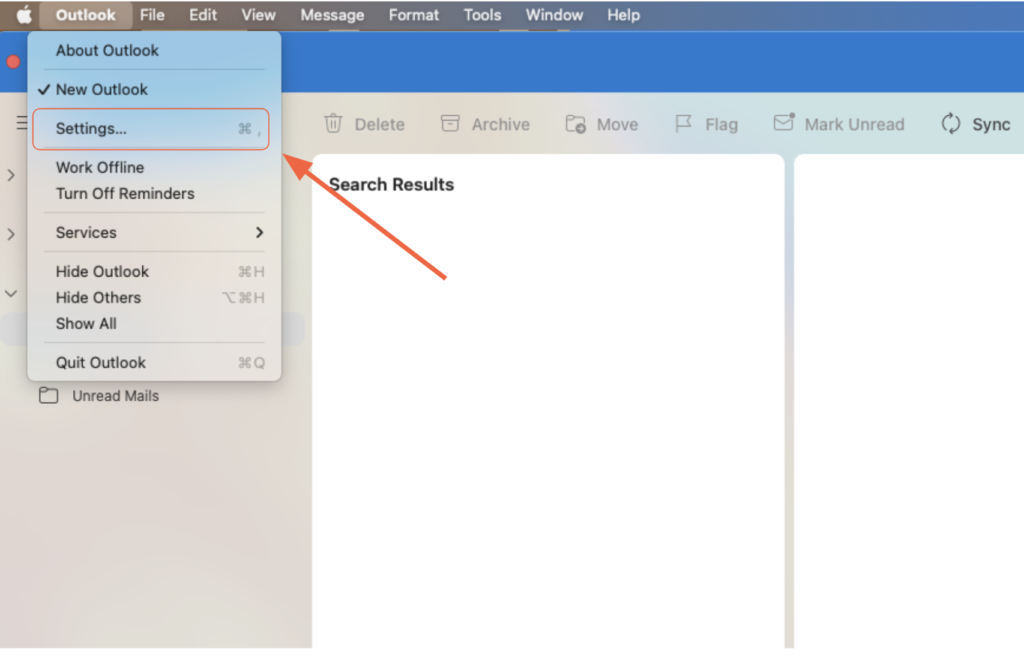
Open Outlook on your Mac. In the top-left corner of your screen, click “Outlook” in the menu bar, then select “Settings” from the dropdown list.
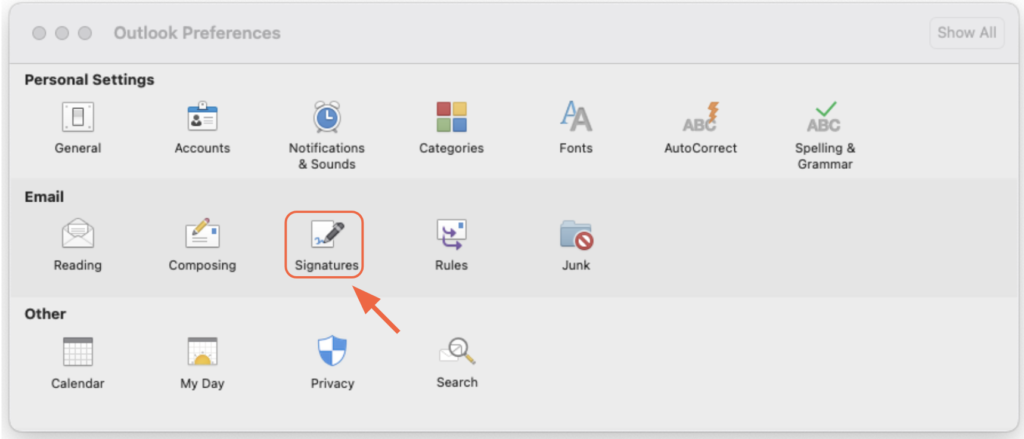
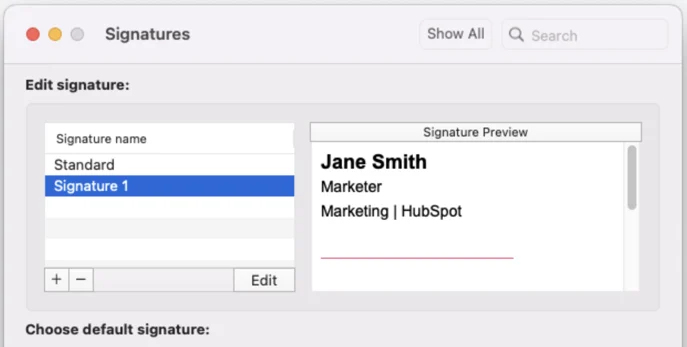
In the Outlook Preferences window, look under the Email section and click on “Signatures.”
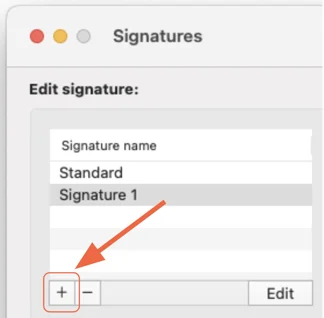
Click the “+” button to add a new signature. By default, it will be named something like “Signature 1.” You can rename it by clicking on the name.
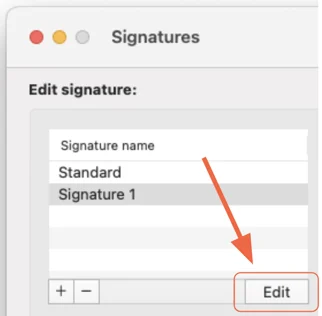
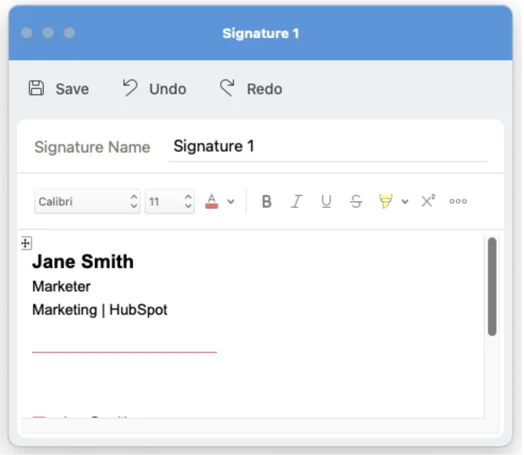
Click the “Edit” button to open the signature editor. This will bring up a new window with a text box where you can enter your signature content.
You can manually type your information, or copy and paste content from another source—such as HubSpot’s Email Signature Generator.
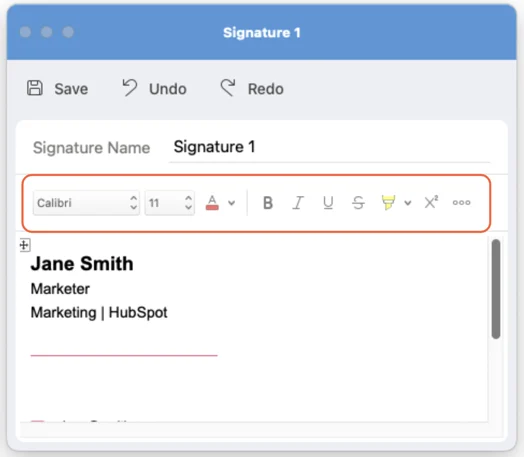
To include an image (like your company logo), click on the three dots (•••) in the editor’s toolbar. Then, select “Pictures” and choose the image file from your computer.

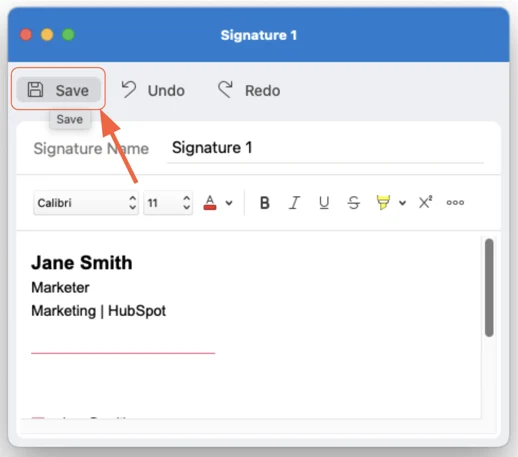
Once you’ve finalized your signature design, click “Save” to keep the changes.
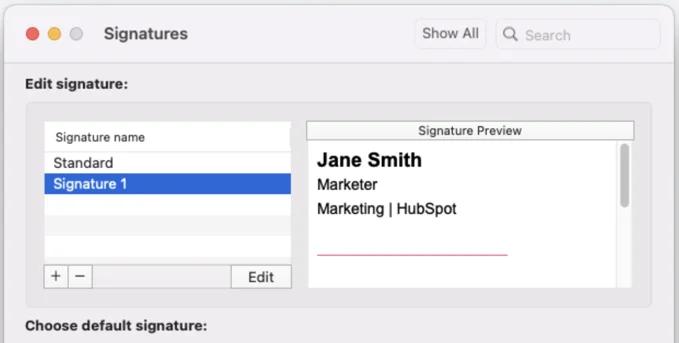
Return to the Signatures window and review your signature in the “Signature Preview” pane to ensure it appears as expected.
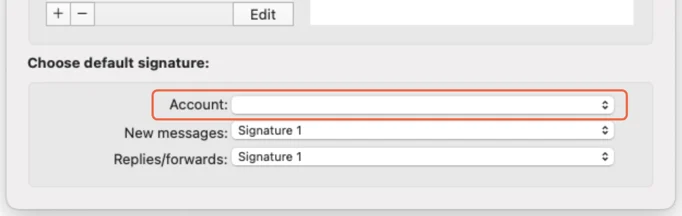
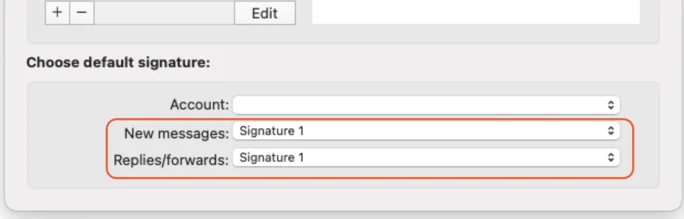
In the “Choose default signature” section:
- Select the email account you want the signature to be associated with.

- Choose when the signature should appear (for new messages, replies/forwards, or both).

After assigning your default signature preferences, click the red “X” in the top-left corner of the window to close the Signature settings.

How to Change a Signature in Outlook for Mac
If you need to update your email signature in Outlook for Mac, follow these simple steps to make and save your changes:
Launch Outlook on your Mac. In the top-left corner of your screen, click on “Outlook” in the menu bar, then choose “Settings” from the drop-down menu.

In the Settings window, under the Email section, click on “Signatures.”

From the list of existing signatures, click on the one you’d like to modify. Then click the “Edit” button.

A new window will open with a text editor. Here, you can:
- Add or remove text
- Insert or update links
- Add images or logos
Feel free to adjust fonts, colors, or layout as needed.
Once you’ve made your updates, click the “Save” button in the top-left corner of the editor window.

Back in the Signatures window, review the “Signature Preview” area to confirm that your updated signature looks correct.
Under the “Choose default signature” section:
- Choose the email account the signature applies to
- Decide whether to use it for new messages, replies/forwards, or both
Once everything is set, click the red “X” in the top-left corner to exit the Signatures settings.

Common Questions about Adding Email Signatures in Outlook for Mac
Q1: How do I add a new email signature in Outlook for Mac?
A: Follow these steps –
- Open Outlook.
- Click Outlook > Settings from the top menu.
- Under the Email section, click Signatures.
- The “+” button can be used to create a new signature.
- Name your signature, click Edit, and enter your desired text.
- Click Save when finished.
Q2: Can I create multiple signatures?
A: Yes. You can create and save multiple signatures (e.g., one for work, one for personal use). You can then select which to apply when composing an email using the Signature button in the message window.
Q3: My signature doesn’t appear automatically. What should I do?
A: Make sure you’ve assigned it as the default signature under “Choose default signature.”
Double-check that you’re editing the correct email account.
Q4: Does my signature sync across devices?
A: No. Outlook for Mac does not automatically sync signatures across devices. You must manually set up the same signature on other devices like iPhones, iPads, or Windows PCs.
Q5: Can I use HTML or code-based signatures?
A: Outlook for Mac supports basic HTML formatting, but advanced scripts or complex code may not render properly. It’s best to use a visual editor or paste in HTML-formatted content carefully.
Final Thoughts
Adding a signature in Outlook for Mac is a simple yet powerful way to personalize your emails, maintain professional branding, and streamline communication. Whether you’re including basic contact details or a fully branded signature with images and links, Outlook offers the flexibility to create and manage multiple signatures with ease.
By following the steps in this guide, you’ll ensure your emails leave a consistent and professional impression, no matter where you’re working from. And should any challenges arise, most can be quickly resolved with simple adjustments in your settings.
